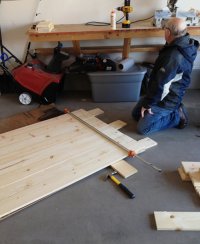
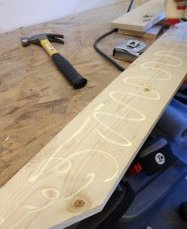
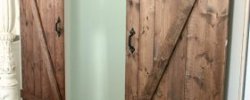
 Each barn door will be created separately. First, put together 8 of your vertical boards UPSIDE DOWN and tighten with pipe clamps. Measure the boards across and cut a horizontal piece to fit.
Put wood glue on the back of the board to secure it better.
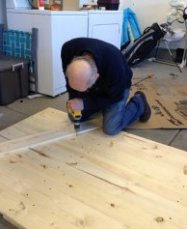
Place the board underneath and use a hammer to secure it and make sure it’s even. Then screw in the board, using 2 screws per vertical board. (Sorry, no screws shown here yet. Keep reading for a visual of the back.)
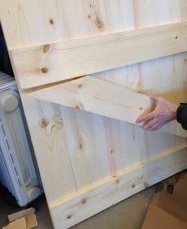
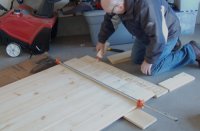 Repeat these steps 3 more times. One at the bottom and two in between, measuring first to make sure they’re even.
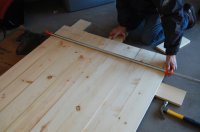
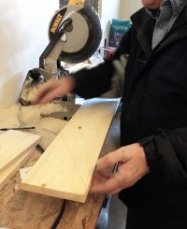
Stand the barn door up and holding your top diagonal piece, measure it and use a pen to mark the cut. Repeat for the bottom diagonal piece.
Cover back with wood glue.
Fit in place. If it doesn’t quite fit perfectly you can shave off a little at a time with your saw.
While the door is still upright put a screw on each end of the diagonal pieces (through the back) to secure the board in place. Then lay the entire door flat so you can drill the other screws into the door. Use a board as your guide so you don’t drill your screw through the front.
 This is what the back should look like with all the screws in place…
Repeat steps to complete the other side, making sure your diagonal pieces are opposite. When your doors are finished give them a quick sanding, then lift the doors up and smile !
I used a few scrap pieces of wood to test colors and ended up with a mixture of these stains: Rust-oleum “Sunbleached” and Minwax “Classic Gray”. (Not 100% sure you’re supposed to mix brands, but it worked, so I went with it! )
Brush stain on with a paintbrush and quickly wipe off. My stain (of course) took a lot darker on the actual barn door, so I used a wet rag to apply, then rubbed with a degreaser to remove some of the stain and give it that worn look. I ended up scrubbing quite a bit to get the look I wanted.
When you’re happy with the color, wait for it to dry then place your lights (optional). Drill a hole for the cord to come through the back and screw the lights into the board where you want them.
To hang my headboard we screwed three small pieces of wood into the studs of my wall, then drilled three screws diagonally into the top of the headboard and straight through those pieces.


Not to my knowledge there is not. I have a 90' suburban with the barn doors. The hinge mounts are a part of the actual body. I do not believe the mounts are manufactured into the body of a suburban with a tailgate.