
RON HAZELTON:
You know, one of the things that I really like about my sliding door here is that I can sit in the kitchen, read the paper and take in the view at the same time. However at night, I get the feeling sometimes that we're the ones that are the view.
That we're actually on stage in here and people walking by on the outside, can look right in and see what's going on. So, my wife and I have decided we've really gotta do something to give us some privacy. Now we thought about putting up a shade or mini blind, but you know, I've got two children and two dogs and I thought that they would probably take their toll on them, plus every time I want to go in or out, I've gotta raise and lower them. So what I've decided to do instead, is to replace these doors with ones that have the window treatments actually inside the glass.
In order to prevent damage to the surrounding wall, I'm using the utility knife to cut through the paint and caulk around the edges of the door casing. Then, I drive a putty knife into the scene and pull the casing away, just enough to insert a pry bar - then work the molding free.
By taking off this strip at the top of the frame, I can remove the sliding door. Anything I can take out of the frame now means less weight to handle when it comes time for removal. On the outside, I remove the screen and cut through the caulk at the edges of the exterior trim. Well, I have an interesting problem or maybe I should say challenge right here. I want to remove this piece of wood trim, but I can't get a pry bar behind it. It's kind of sitting behind the siding or shingles on this and the door frame over here.
So what I want to do is locate the nails, the face nails right here, and to do that, I'm not gonna use this but I'm gonna use this. It's actually a magnet. I'll put it here on the casing, the trim, move it around and uh, here we go. So I know that right behind this is where that nail is and that's where I'll start my digging.
This terrific tool called a tiger's paw has sharp tines that burrow into the wood and grip the shaft of a nail. When the opposite end of the tool is pushed downward, the buried nail is pulled to the surface. Then it can be removed with a flat bar or hammer.
With the nails out of the way, the wood trim pries off easily. I find a few nails through this plastic fin, which the tiger's paw makes short work of. Sliding doors are installed in different ways. The trick is to find all the screws and nails, securing it to the framing.
In my case, the frame is attached on the left side and along the top. I pull off the sill support just to be sure there aren't any screws through the bottom. Next, I take out the fixed door panel and sure enough, there are more screws down the right side of the frame.
With everything removed, I try to tap the frame free. Well try is the operative word here.
[MUSIC]
After a lot of hammering, I finally discover one final screw hidden up inside the latch plate. Finally, the frame gives up its grip. Well, the old door is out. Now your door might come out differently. Couple of things to keep in mind. Be patient and look for any hidden fasteners, screws or nails, because even one of them can keep the frame from coming out easily.
Now I have to do a few things to prepare this rough opening for the new door, and the first one is to make sure that the sill down here is level and that the sides are plumb. Good. And - excellent.
After measuring the opening, I find that it's just a bit too large for the new door, so I nail on strips of plywood to reduce it to the correct size. The next step in preparing the opening is making it absolutely water tight. This foil tape has a butyl rubber adhesive backing.
I press the tape firmly in place, making sure to run it at least six inches up the jamb. At the corners, I make two small cuts - then fold the tape over the edges. I put down a second strip on the threshold, then apply it along the entire opening, again making sure to wrap the corners.
I put back the sill support I removed earlier and nail it in place. On top of the foil tape, I put down three beads of silicone that will form a weathertight seal at the bottom of the door sill.
Well, I'd say it's time to put this door in. Now, important thing is, I want to put the bottom of the door in first and then tilt it up, so that I don't disturb these beads of caulk down here. Now even though the sliding panel has been removed, this door is heavy.
So I've asked my friend Jeff to give me a hand lifting it into place. Driving a couple of roofing nails through the fin, holds the door in position temporarily. Inside, I check the sill for level and the jambs for plumb. Then begin shimming the door to hold it securely in place.
Next, I run two screws through the latch side of the frame, through the shims and into solid wood. Then go back outside to put the rest of the nails in the metal fin. Before I put screws through the sill, I fill the holes with silicone to make certain there will be no leaks around the fasteners. Finally, I drive in screws at the top. Now that door is not going anywhere.
Outside, I place one final layer of butyl backed aluminum tape on top of a nailing fin. Then, Jeff and I lift the sliding door onto the bottom track. Next, I install the exterior wood trim, first on the top - then on the sides.
I've cut it narrow enough to leave an expansion gap between the trim and the frame. Into that gap, I first foam backer rod, then fill the remaining space with silicone sealant. If the wood trim expands during humid weather, the backer rod and sealant will compress, preventing the expanding wood from deforming the door frame. Back inside, I trim the shims and begin filling the space around the frame with low expansion insulating foam. It's important not to use high expansion foam that could distort the frame and cause the door to bind.
Well, day has turned into evening, but before I stop, I want to install the interior door casing. Tomorrow, it's all about the decorative touches. First thing in the morning, I grab the door hardware out of the van and put it on.
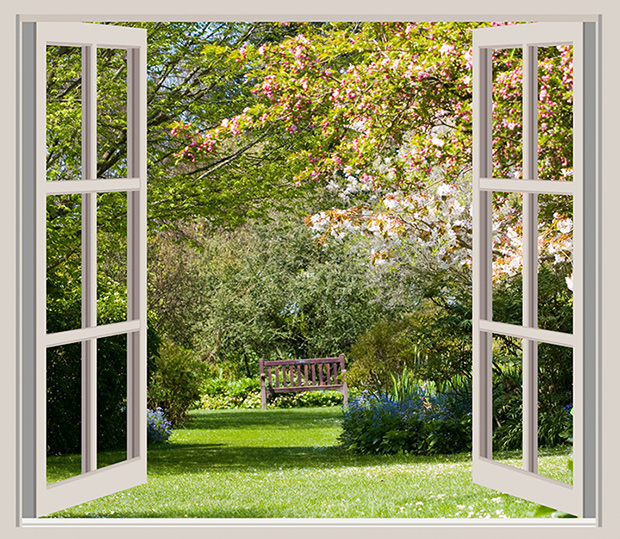
To install the window treatments, I just open the interior glass panel and snap them in place. I've got my choice of mini blinds, shades, or grilles. Now, from the outside, what I like about these doors is that they're aluminum clad and that means no painting.
And on the inside, I just love the fact that the window treatments are between the glass. No cords, they're virtually dust free and because the grilles themselves are also inside, they're a cinch to clean. Now if you look through both of these doors, you won't see a screen and that's because it's right inside here.
It rolls out when I want it and rolls back when I don't. And of course when it comes to energy efficiency, these windows are state of the art. Two pieces of glass with argon gas in between for insulation value and the glass itself has a low E coding on it that will filter out ultraviolet light and prevent fading on draperies, carpets and fabrics.


That's a wild question........do you have a door in your house now where this new one is going? If not you may have to put a "header" beam in to carry the floor or roof weight above it. Best thing to do is find and old carpenter in the neighborhood and ask him to come and take a look. I'm sure he would be happy to give you some advice. Good luck to you...........If you have no one email me and tell me what's really going to happen and I will try and help you.