
In the past, pet owners that had sliding patio doors leading outside didn't have an option when it came to pet doors. This unique door system allows all pets to come and go freely. A dog or cat that can exercise and relieve himself whenever he chooses is happier and healthier.
Training your pet to use the pet door:
The 2-way pet door swings in and out so your pet can come and go with ease. Most animals learn to use the pet door with a minimum of help. Here's all you do:
- Bring your pet to the door. It helps for you to be on the opposite side of the door from your pet.
- Lift up the vinyl flap a few inches and try to coax your pet into coming through. Sometimes a little food will work as a reward for his coming through.
- Pet him and talk to him. Do not shove him through. Don't worry - he'll learn quickly enough!
Note: If your pet won't go through, tie the vinyl door in the open position until your pet goes through the door on his own.
For your protection: For additional security you may wish to install a kick lock for your sliding glass door. This may be purchased at most hardware retailers.
To lock your pet in or out: When you don't want your pet to use the pet door, be sure to put the closing panel on the same side as you put your pet. He'll see a solid door and won't try to go through it.
Your pet door can be easily cleaned: To clean, simply use mild dish washing soap and a sponge. Do not use harsh, abrasive cleaning materials on your pet door. Rinse thoroughly.
Parts list:
(1) Patio panel
(1) Panel latch assembly
(1) Roll weather stripping
(1) Glass sweep
(4) Binding posts
(4) 1/4" (6 mm) Phillips sheet metal screws
(4) 5/8" (16 mm) Phillips sheet metal screws
(4) 3/4" (20 mm) Machine screws
Tools required:
Electric drill
1/8" (3 mm) Drill bit
7/32" (5.6 mm) Drill bit
Phillips head screwdriver
Flat head screwdriver
Scissors
Pencil
Assembly and installation:
To install the panel into your sliding glass door track:
Step 1. Set the panel in the sliding glass door track. Place the top of the panel in the top door track groove. Compress the spring-loaded height adjuster by pushing the panel up and placing the bottom of the panel into the corresponding bottom track groove.
Step 2. Fit the panel into place. Slide the panel against the door jam. There should be no gaps between the door jam and the panel. Your sliding glass door should butt flush against the panel when closed.
Note: Your sliding glass door and the panel must butt flush on the inside of your home in order for the panel latch to work properly.
Step 3. Secure the height adjuster to the panel. Test and make sure you are satisfied with the fit of the panel and how it works in conjunction with your sliding glass door. Drill 1/8" (3 mm) holes through the 4 pre drilled holes (2 each side) on the height adjuster. Fasten the height adjuster to the panel with the (4) 1/4" (6 mm) sheet metal screws provided.
Step 4. Secure the panel to the sliding glass door frame. Drill (2) 1/8" (3mm) holes through the top and (2) 1/8" (3 mm) holes through the bottom of the panel and into the door frame. Fasten the panel to the door frame with the (4) 5/8" (16 mm) sheet metal screws provided.
To install the glass sweeps:
Note: The glass sweeps provided should be installed onto your sliding glass door to help ensure a good seal and keep insects from entering your home through the gap between your sliding glass door and your stationary glass door.
Step 5. Attach the glass sweeps to your sliding glass door. Before attaching glass sweeps, clean the surface area where the sweeps are to be placed. Before removing the adhesive backing, pre-position each sweep onto your glass door to determine the correct position. Hold each sweep in place as you peel the adhesive from the top and press it firmly in place toward the bottom. Trim any excess off at the bottom with a scissors. The flexible part should rest against your stationary door glass.
To install the panel latch:
Note: The panel latch assembly consists of one male part and one female part, plus (4) binding posts and (4) machine screws. For security reasons, all of the binding posts must enter from outside your house, and the screws must enter from inside your house.
Step 6. Attach the male part to the panel. Use (2) of the binding posts and (2) 3/4" (20 mm) machine screws provided to mount the male part to the panel. Close your sliding glass door against the panel.
Step 7. Position the female part to your glass door. Close your sliding glass door against the panel. Connect the panel latch parts together by flipping the lever on the male part so it catches the female part and locks together. Mark...


I`m just stabbing in the dark here for lack of info.
If they are in separate bores, yes you can replace them separately.
If you look at the edge of the door and you have one plate encompassing both latch and deadbolt, then more than likely you`ll have to replace the whole mortise box.
Although some have a screw through said plate that you can remove to release the cylinder, then check it with your key. If it works independently from the box, the problem is in the box and it should be replaced
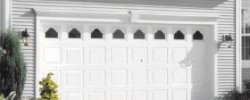
One would buy security doors to protect their home from invadors. They would also buy security doors to add an additional layer of security to their home.