
1. For the MOST vehicles, the first time programming with a SOMMER or Direct Drive opener, press and hold all 3 HomeLink buttons for approximately 30 seconds, releasing only when the HomeLink indicator light turns off. (Do not perform this step when programming the additional HomeLink buttons)
2. To ensure HomeLink is in the proper training mode, press and hold each of the buttons individually. When pressed, the individual HomeLink button should make the indicator light blink rapidly for 2 seconds and then turn a solid/continuous light.
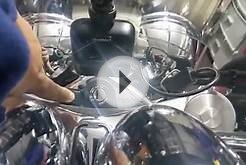
A second person may make the following steps quicker & easier. As a safety precaution, DO NOT stand on your vehicle. Use a stepladder or other stable, safe device.
3. At the garage door opener receiver (Control Housing) in the garage, locate the Learn button. If there is difficulty locating the Learn button, please reference the garage door opener’s manual.
4. Press and release the Learn button (which activates the “Radio” light) NOTE: Once the button is pressed, there are approximately 10 seconds in which to initiate the next step.
5. Return to the vehicle and firmly press and hold the desired HomeLink button to be programmed for two seconds and release. Repeat the “press/hold/release” a second time to activate the door. (You may need to repeat this sequence of pressing the Learn button on the Control Housing and then pressing the HomeLink button in the vehicle up to 3 times to complete the training process).
HomeLink should now activate your rolling code equipped opener.
Mercedes and BMW For HomeLink modules with a multi-color LED(these HomeLink modules are not as common, usually found on certain European vehicles):
1. Press and hold the outer two buttons for approximately 10 seconds, releasing only when the HomeLink indicator light turns green.
2. Wait approximately 10 seconds for the HomeLink indicator light to turn off.
3. Press and hold the middle button for approximately 20 seconds, releasing only when the HomeLink indicator turns green.
4. Wait approximately 10 seconds for the HomeLink indicator light to turn off.
5. To ensure HomeLink is in the proper training mode, press and hold each of the buttons individually. When pressed, the individual HomeLink button should make the indicator light blink rapidly until the button is released. A second person may make the following steps quicker & easier. As a safety precaution, DO NOT stand on your vehicle. Use a stepladder or other stable, safe device.
6. At the garage door opener receiver (Control Housing) in the garage, locate the Learn button. If there is difficulty locating the Learn button, please reference the garage door opener’s manual.
7. Press and release the Learn button (which activates the “Radio” light)
NOTE: Once the button is pressed, there are approximately 10 seconds in which to initiate the next step.
8. Return to the vehicle and firmly press and hold the desired HomeLink button to be programmed for two seconds and release. Repeat the “press/hold/release” a second time to activate the door.
(You may need to repeat this sequence of pressing the Learn button on the Control Housing and then pressing the HomeLink button in the vehicle up to 3 times to complete the training process).
HomeLink Video BMW (Mirror)
Audi, Porsche, and VW - MMI display1. Press and hold the outer two buttons for approximately 10 seconds, releasing only when the HomeLink indicator light changes from flashing to on solid.
2. Press and hold the middle button for approximately 20 seconds, releasing only when the HomeLink changes from flashing to on solid. Ignore the message on the MMI display asking if you want to program button II. Press the MENU button to clear this message from the display.
3. To ensure HomeLink is in the proper training mode, press and hold each of the buttons individually. When pressed, the individual HomeLink button should make the indicator light blink rapidly until the button is released. A second person may make the following steps quicker & easier. As a safety precaution, DO NOT stand on your vehicle. Use a stepladder or other stable, safe device. 3
4. At the garage door opener receiver (Control Housing) in the garage, locate the Learn button. If there is difficulty locating the Learn button, please reference the garage door opener’s manual.
5. Press and release the Learn button (which activates the “Radio” light) NOTE: Once the button is pressed, there are approximately 10 seconds in which to initiate the next step.


Take the transmitter out of the harness and insert a small screw driver in to the divet on the side of the remote. This will pop open the remote for battery replacement. Although if you were to bring this to some place like radio shack they would do it for you. Thanks BB